
A clogged or sluggish sink is one of the most common household headaches—and in many cases, the culprit is the drain stopper. Whether it’s tangled hair, soap scum, or debris trapped around the stopper mechanism, cleaning or replacing the stopper often restores proper drainage. Fortunately, removing a sink drain stopper is a simple project that doesn’t require advanced plumbing skills or specialized tools. With a little guidance, you can take the stopper out, clean it, and reinstall it in just a few minutes.
Understanding the Type of Drain Stopper You Have
Before you begin, it’s important to identify the style of stopper installed in your sink. The removal method varies depending on the type:
-
Lift-and-Turn Stopper
Common in bathroom sinks. It turns left and right to open and close. -
Pop-Up Stopper
Operates via a lift rod behind the faucet that connects to a pivot rod under the sink. -
Push-and-Seal (Push Pop-Up)
Opens and closes when you press down on the stopper. -
Toe-Touch / Foot-Activated Stopper
Used mostly in bathtubs, operated with your foot rather than by hand. -
Flip-It Stopper
Includes a toggle mechanism on the stopper itself.
A quick inspection will reveal which style you have. Once identified, you can follow the correct removal method.
Tools You May Need
Most stoppers can be removed by hand, but these items may help:
-
Adjustable pliers
-
Bucket or bowl (to catch dripping water)
-
Flashlight
-
Cleaning gloves
-
Old toothbrush or drain brush
How to Remove Each Type of Drain Stopper
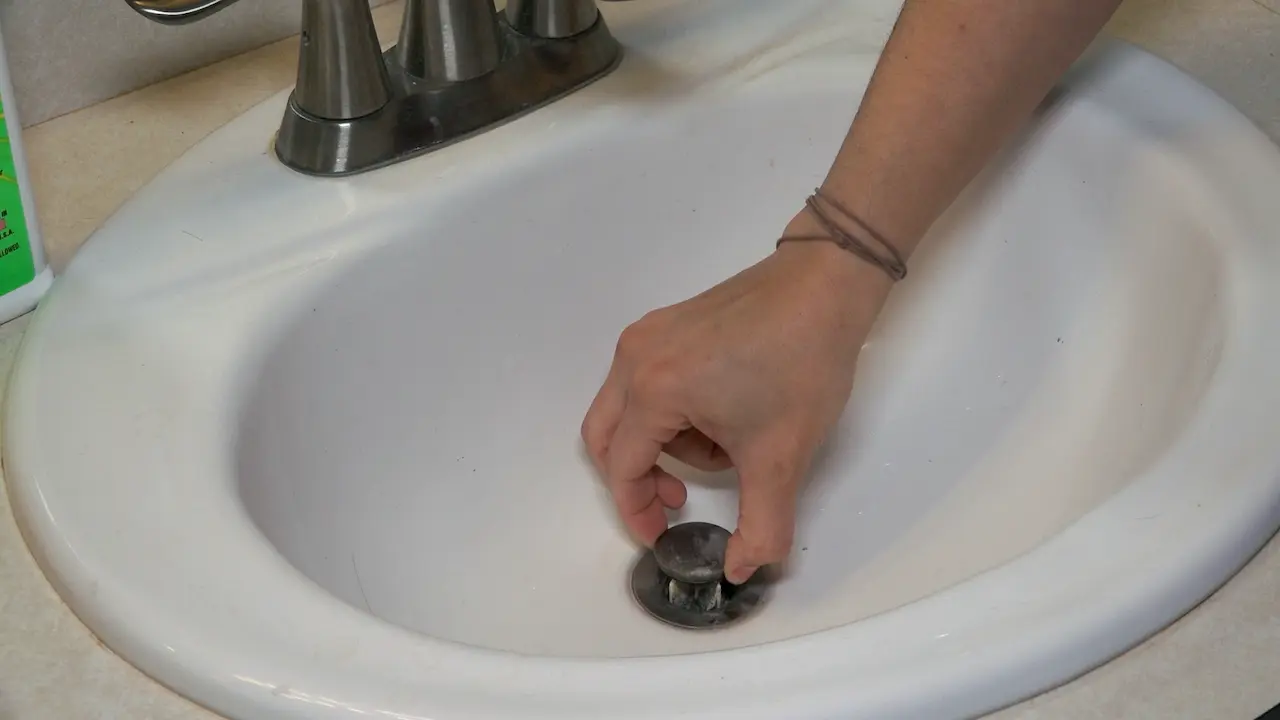
Removing a Lift-and-Turn Stopper
-
Lift the stopper halfway up.
-
Look for a small set screw at the base of the stopper.
-
Use your fingers or a small screwdriver (depending on design) to loosen it.
-
-
Turn the stopper counterclockwise until it comes off.
-
Pull it upward to remove it from the drain.
Tip: If the stopper continues to spin without lifting out, tighten the screw slightly and try again.
Removing a Pop-Up Stopper
Pop-up stoppers involve a secondary mechanism underneath the sink.
-
Start by lifting the stopper to its open position.
-
Go under the sink and locate the pivot rod—a horizontal rod connected to the drainpipe.
-
Follow the rod to where it is held by a retaining nut.
-
Place a bowl underneath to catch any water.
-
Loosen the retaining nut by hand or with pliers.
-
Slide the pivot rod out of the drainpipe.
-
Return to the sink and pull the stopper straight up and out.
Tip: If the stopper doesn’t come out easily, wiggle it while pulling—it may still be slightly connected to the rod.
Removing a Push-and-Seal / Push Pop-Up Stopper
-
Press the stopper so it pops into the open position.
-
Firmly grip the stopper head and turn it counterclockwise.
-
Continue rotating until the stopper detaches and can be lifted away.
Note: Some models require you to unscrew the threaded base in the drain after removing the top portion.
Removing a Toe-Touch Stopper
-
Push the stopper into the open position.
-
Turn the stopper counterclockwise to unscrew the top cap.
-
Once the top section is removed, unscrew the brass shaft underneath and lift out the rest of the stopper.Removing a Flip-It Stopper
-
Move the toggle lever to the open position.
-
Firmly grasp the stopper and pull upward.
-
If it sticks, gently rock it back and forth while pulling.
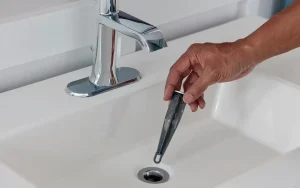
Cleaning the Stopper and Drain
Once the stopper is out, you’ll likely see buildup that has restricted water flow.
-
Wipe away debris with a paper towel.
-
Scrub the stopper using warm water, dish soap, and an old toothbrush.
-
Clean inside the drain opening with a brush or drain snake if needed.
-
Flush the drain by running hot water for a few minutes.
For persistent odor or buildup, a mixture of ½ cup baking soda followed by 1 cup of vinegar can help break down grime. Allow it to foam for 10–15 minutes before flushing with hot water.
Reinstalling the Stopper
The stopper can usually be reinstalled by reversing the removal steps. Here are general guidelines:
-
For lift-and-turn, screw it back in and tighten the set screw.
-
For pop-up, insert the stopper into the drain and reconnect the pivot rod before tightening the retaining nut.
-
For push-and-seal, twist clockwise until tight.
-
For toe-touch, reinstall the shaft and screw the cap back on.
After reinstalling, run water to ensure there are no leaks or drainage issues.
When the Stopper Is Damaged
If you notice deterioration, corrosion, or broken metal parts—especially around the pivot rod connection—replacement may be necessary. Replacement stoppers are inexpensive and widely available. When replacing a pop-up assembly, consider upgrading to a push-pop stopper since it simplifies future cleaning.
Preventing Future Clogs
-
Install a hair-catching drain screen.
-
Avoid rinsing heavy creams, oils, paint, or plaster down the sink.
-
Flush drains regularly with hot water.
-
Clean the stopper every 1–3 months.
Keeping up with maintenance not only improves drainage but extends the lifespan of your plumbing.
FAQs
1. How long does it take to remove a sink stopper?
Generally 5–15 minutes, depending on the stopper type and buildup in the drain.
2. Do I need to turn off the water before removing a stopper?
No. You do not need to shut off the water supply. Just avoid running water during the process.
3. What if I can’t loosen the pivot rod nut under the sink?
Apply a little penetrating oil and use pliers. If corrosion prevents removal, the drain assembly might need replacement.
4. My stopper spins but won’t come out—what should I do?
This commonly happens with lift-and-turn stoppers. Tighten the set screw slightly, then try turning counterclockwise again.
5. Can removing the stopper damage my plumbing?
Not if you follow the correct method. Avoid forcing parts or over-tightening nuts when reinstalling.
6. Is it safe to pour chemical drain cleaners after removing the stopper?
Chemical cleaners can damage pipes and seals over time. Manual cleaning or natural cleaners are safer and often more effective.
7. Why does water still drain slowly after removing and cleaning the stopper?
There may be buildup deeper in the drain line. You may need a drain snake, plunger, or professional plumbing help.